
Let's just keep the dog-loving theme going a bit, shall we? I have a DIY project to share that I think can also evolve into an interesting idea for Valentine's Day (more on that later). I made these dog bone ornaments for all the dogs in our family for Christmas this past season, but I think they'd work great as gifts anytime for the dog lovers in your life.


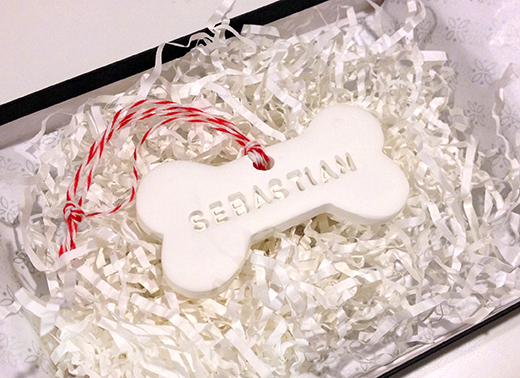


To give credit where credit is due, I was inspired by the technique used for these moose ornaments on the 101 Woonideeën blog. But, I wanted to do something dog-oriented and personalized, and that reminded me of the brand name stamped into Milk Bones. So I arrived at:
So, here's what you'll need:
• White craft clay. I used the type you need to bake, not the air-dry variety. This is non-toxic and can bake in your oven at 250˚. Brands include Fimo and Sculpey. You can get them at any craft store.
• An acrylic roller. This was worth buying. It works perfectly when rolling out this kind of clay. It can be found at most craft stores.
• A clay mat. Great to work on and transfer directly onto a baking sheet. I got mine at Michael's.
• Letter stamps. Boy, these were tough to find (in a simple, clean font, that is). Craft stores have some in goofier styles, so I had to order these online by searching for "fondant stamping letters".
• Assorted cookie cutters for the design shape you want, and large enough to fit the words you will use.
• A drinking straw (or anything similar) to punch a decent-sized hole if hanging it with ribbon or string.
• Ribbon or string for hanging. I used red and white baker's twine for mine. For Valentine's Day, these would look great with assorted hot pink and red ribbons.
There are instructions on the 101 Woonideeën blog, if you translate it, but to summarize:
1. Work with the clay as instructed (soften, form into ball, roll out ball like cookie dough, about 1/8", no more than 1/4").
2. Then, cut out your shapes with a cookie cutter and arrange them on the baking mat.
3. Load the letters into the tray backwards (remember it is a mirror image and then turned over and stamped). Using very light pressure (this was hard to get just right), evenly stamp the surface of the clay with the word tray. Leave enough room above the word for the hole that will be used for hanging it.
4. Using the end of a drinking straw, pierce a hole all the way through the shape in the top center so it will hang evenly.
5. Bake in the oven according to the clay package instructions.
6. After they cool, you CAN lightly sand any rough or dinged edges. Thread the hole with ribbon or string. Done!
So, given that we are coming up on Valentine's Day, it got me thinking of converting this idea into gift tags inspired by the ever-iconic conversation heart candies. With so many clay colors available and your stamping letters at the ready, all you'd need to add is a bit of hot pink paint to the indented letters. I might not have time this year, so maybe next! What do you think?


Post a Comment